First of all a huge THANK YOU for purchasing my WordPress Theme at Themeforest. If you have any questions that are beyond the scope of this help file, please join our Support Forums. If you’d like to start a new thread over there I’ll get any issues you’re experiencing sorted out. You can also follow me on Themeforest to keep track of all my theme updates and future themes. Thanks so much!
Created: 2013/11/22
By: Envirra
Email: Envirra
In order to proceed with the theme installation, you must be running WordPress 3.5 or higher, PHP 5.3 or higher.
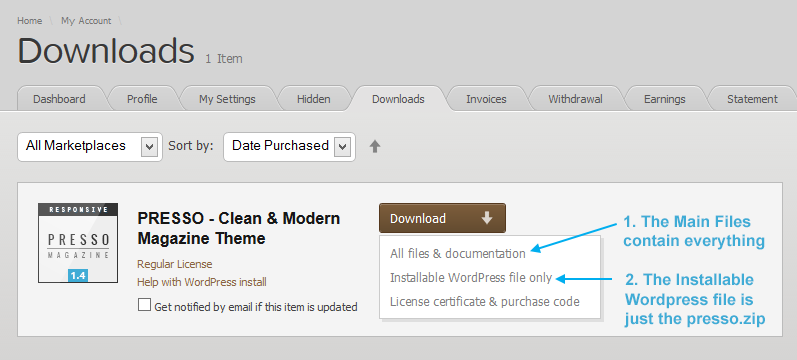
Navigate to your downloads tab on Themeforest and find Presso. Click the download button to see the two options. The Main Files contain everything, the Installable WordPress Theme is just the installable WordPress theme file.
Appearance → Themes.Install Themes and hit the upload buttonpresso.zip file on your computer and click Install NowAppearance → Themes and activate it.press.zip file and ONLY use the extracted Presso theme folder.wp-content → themes folder.Appearance → Themes and activate it.If there are existing images in your wordpress, Please install and run the plugin Force Regenerate Thumbnails to regenerate your thumbnails for better image quality on your site.
You can update your theme via FTP or via WordPress. See the information below for each method. No matter what method you choose, you first need to download the new theme files from Themeforest.
wp-content → themes location and backup your Presso theme folder by saving it to your computer, or you can choose to simply delete it. Your content will not be lost.presso.zip file from your new Themeforest download (only theme file) and extract the file to get the presso theme folder.wp-content → themes location. Choose to Replace the current one if you did not delete it.Appearance → Themes section by simply activating a different theme. Once you activate a different theme, you can delete the Presso theme. Dont worry, your content will not be lost.presso.zip file from your new Themeforest download (only theme file) and extract the file to get the presso theme folder.presso.zip file in the Appearance → Themes section. Click on the Install Themes tab at the top and choose to upload the zip file.In downloaded files from ThemeForest you can find a "Plugins" folder containing these plugins:
Other plugins we recommend to you to install:
The theme comes with a .xml file containing demo content you can import into your WordPress site. This will help you get started, in case you are running on a fresh WP installation with no content at all.
1-Click Demo Content Installation
Appearance → Theme Options.How to Import Demo Content by Manual
Tools → Import.demo-content.xml file located in the archive which you have downloaded from ThemeForest and click "Upload file and import" button.Pages → Add New.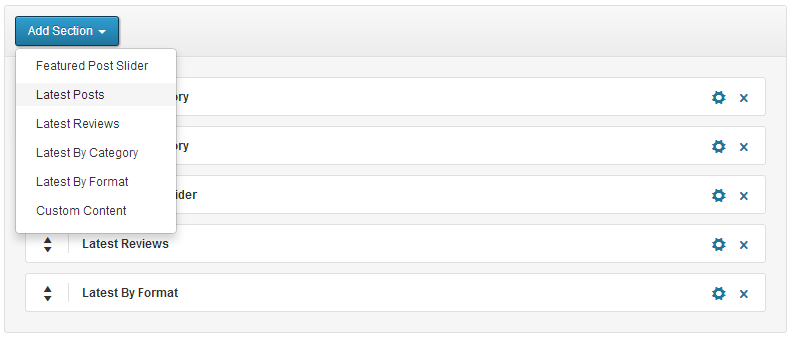
After selecting the "Page Composer" template you see the Page Composer interface which easily lets you create the homepage layout. To get started click on the "Add Section" button and you will see all the available sections you can add to your homepage.
Now you have to tell WordPress wich page is your site homepage.
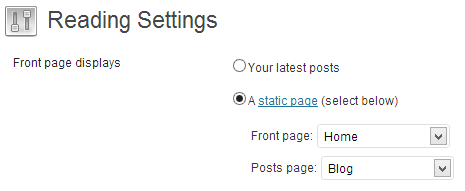
Settings → Reading. To create a new categoty, navigate to Posts → Categories.
To create a new post, navigate to Posts → Add New.
We enabled four WordPress native post formats. Each format has it's own custom fields (except Standard) for simple content making.
By using options in this box you can deside what happens in single post.
To create a WordPress gallery follow this steps:
You can add a review and score fetures to any post. To enable this feature locate the "Review Option" meta box under the editor and click the "Enable Review" checkbox.
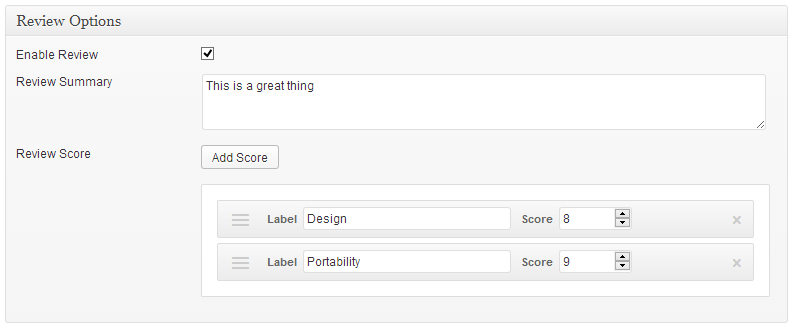
After the additional fields are open you can start creating your review.
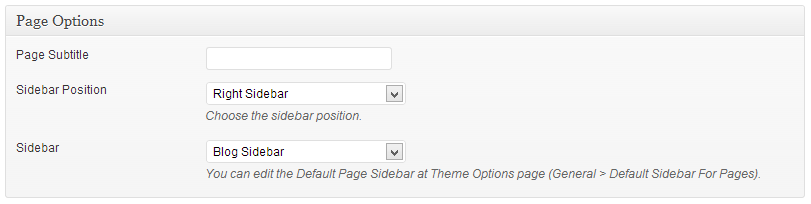
Static page can be created with sidebar or full width (without the sidebar). You don't have to select any templates to configure the page.
To start creating the pages navigate to Pages → Add New. Leave the "Default Template" in "Template" dropdown.
Locate "Page Options" meta box on the page.
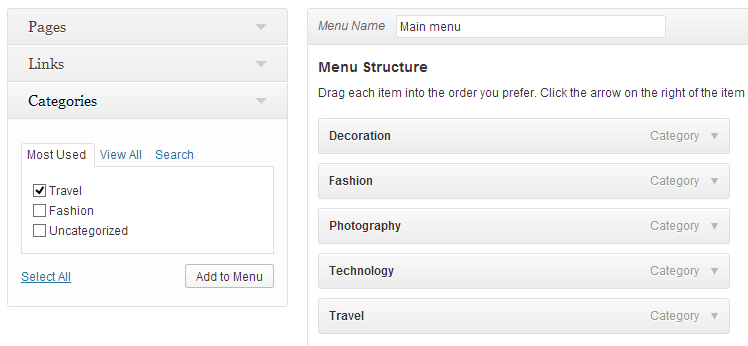
Follow the next steps to define menus for each of the theme's menu locations. In each menu, you can add as many items you need.
Appearance → Menus and click Add Menu.The theme comes with 2 custom menu locations: Main Menu (with mega menu feature) and a Top Menu. You must define your menu items for each menu location, once you have created your pages.
The latest posts of the category will be shown on the main menu by automatically. Just add the category item on the menu.
To make your author avatar to appear on your site, register at gravatar.com with the same email you registered at your site.
We added some extra fields to the user profile page to extend the information about the authors of your site. The added fields are: Social Profiles and a Custom Avatar upload instead of the default WP gravatar.
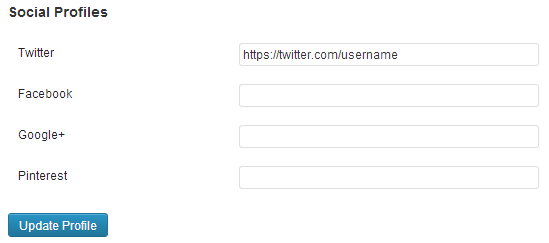
To add a new author and information that will be visible on the front, follow this steps:
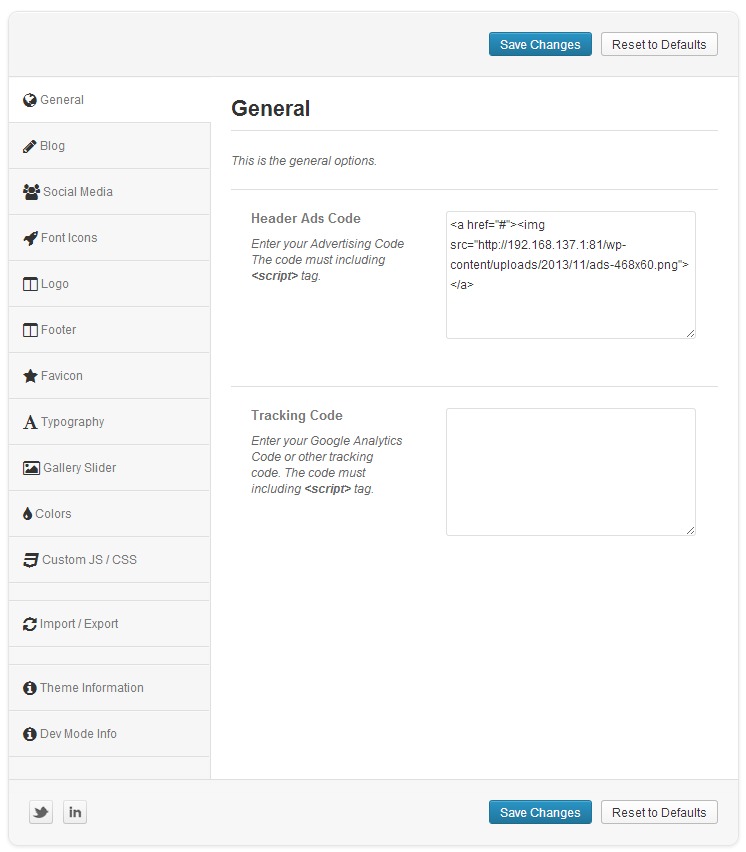
Users → Add NewThe Theme Options Panel helps you easily take control over your site, by allowing you to upload your logo and favicon, style the appearance of the theme with your custom colors, change fonts, turn features on and off, paste custom CSS and JS code, paste the Analytcs code without having to write any code.
To access the Theme Options panel, navigate to Appearance → Theme Options.
After you create a set of settings, you might want to save your work. This is useful if you want to experiment with the options while keeping the old settings in case you need them again.
Navigate to the "Import / Export" tab and click the 'Download' button. Once the download is finished, you will be able to restore your options by clicking the 'Import from file' button, paste the data of downloaded file, and clicking the 'Import' button.
You can tranfer the saved options data between different installs by clicking the 'Copy' button and copying the text inside the text box. To import data from another install, click the 'Import from file' button and paste the data in the text box with the one from another install and click "Import".
The theme comes with 5 Sidebar areas:
The theme comes with 9 custom widgets:
We have created a very nice and lightweight shortcode generator with very understandable and intuitive interface.
After installing the plugin, navigate to any page or post where you want to add the shortcode. You will see a new button ![]() was added to the editor. Click on the button and you'll see the dropdown with all available shortcodes.
was added to the editor. Click on the button and you'll see the dropdown with all available shortcodes.

To start generating the shortcodes, make sure your mouse cursor is blinking inside the editor and click on one of the shortcode name.
There are two ways to customize the theme without changing it's core files.
To style the theme with custom CSS, navigate to Appearence → Theme Options and click on the "Custom JS/CSS" tab. The first text box "Custom CSS" is where you can wright your own CSS code.
The theme comes with it's Child Theme. If you want more complex cutomization of the parent theme and change the files, layout, html, objects order this way is even better. To start using child follow this steps:
Appearence → ThemesThat is it, now the child theme is ready. You can open the style.css file and write your CSS there. It will override the default the CSS from the parent theme. You can also copy any file from the parent theme, put it inside the child them and make the changes.
This Premium Theme is fully translation ready! The translation files .po/.mo are located in /presso/languages in the Themes folder. We've included English Translation right away.
To translate the theme, just follow these steps:
define('WPLANG', 'de_DE');
de_DE to you language and country code.
To rename different Words, like "Read More", "Comments" etc, just follow these steps:
define('WPLANG', 'en_EN');
Instead of using POEdit, You can use the localization plugin like Codestyling Localization.
Notice: We constantly develop new features, so after downloading a new Version we recommend to check that everything is translated correct.
Jay DeFehr - http://www.flickr.com/photos/jay_defehr
Daniel Zedda - http://www.flickr.com/photos/astragony/
_dChris - http://www.flickr.com/photos/_dchris/
mark sebastian - http://www.flickr.com/photos/markjsebastian/
Kenny Louie - http://www.flickr.com/photos/kwl/
atomicjeep - http://www.flickr.com/photos/atomicjeep/
William Cho - http://www.flickr.com/photos/adforce1/
warrenski - http://www.flickr.com/photos/warrenski/
Allen - http://www.flickr.com/photos/whoalse/
Luis Hernandez - http://www.flickr.com/photos/d2k6/
Ian Norman - http://www.flickr.com/photos/inorman/
Glenn Brunette - http://www.flickr.com/photos/gbrunett/
Adrian ... - http://www.flickr.com/photos/41279068@N08/
Stig Nygaard - http://www.flickr.com/photos/stignygaard/
Roberto Taddeo - http://www.flickr.com/photos/robertotaddeo/
Daniel M Viero - http://www.flickr.com/photos/danielviero/
Dave Dugdale - http://www.flickr.com/photos/davedugdale/
Jack Donaghy - http://www.flickr.com/photos/jackdonaghy/
News Oresund - http://www.flickr.com/photos/newsoresund/
Highways Agency - http://www.flickr.com/photos/highwaysagency/
Redux Framework - http://reduxframework.com